Royal Enfield Model K Similaria
-
When attending AMA’s Vintage Motorcycle Days event at Mid-Ohio Sports Car Course in ………… a motorcycle that I had never seen before was stopped in a line of traffic. I ran up to the rider and, with some exuberance, asked, “What is this?” The rider was Aniket Vardhan and he was on not only a motorcycle he had built, but he was also on a motorcycle that had an ENGINE he had designed and built.
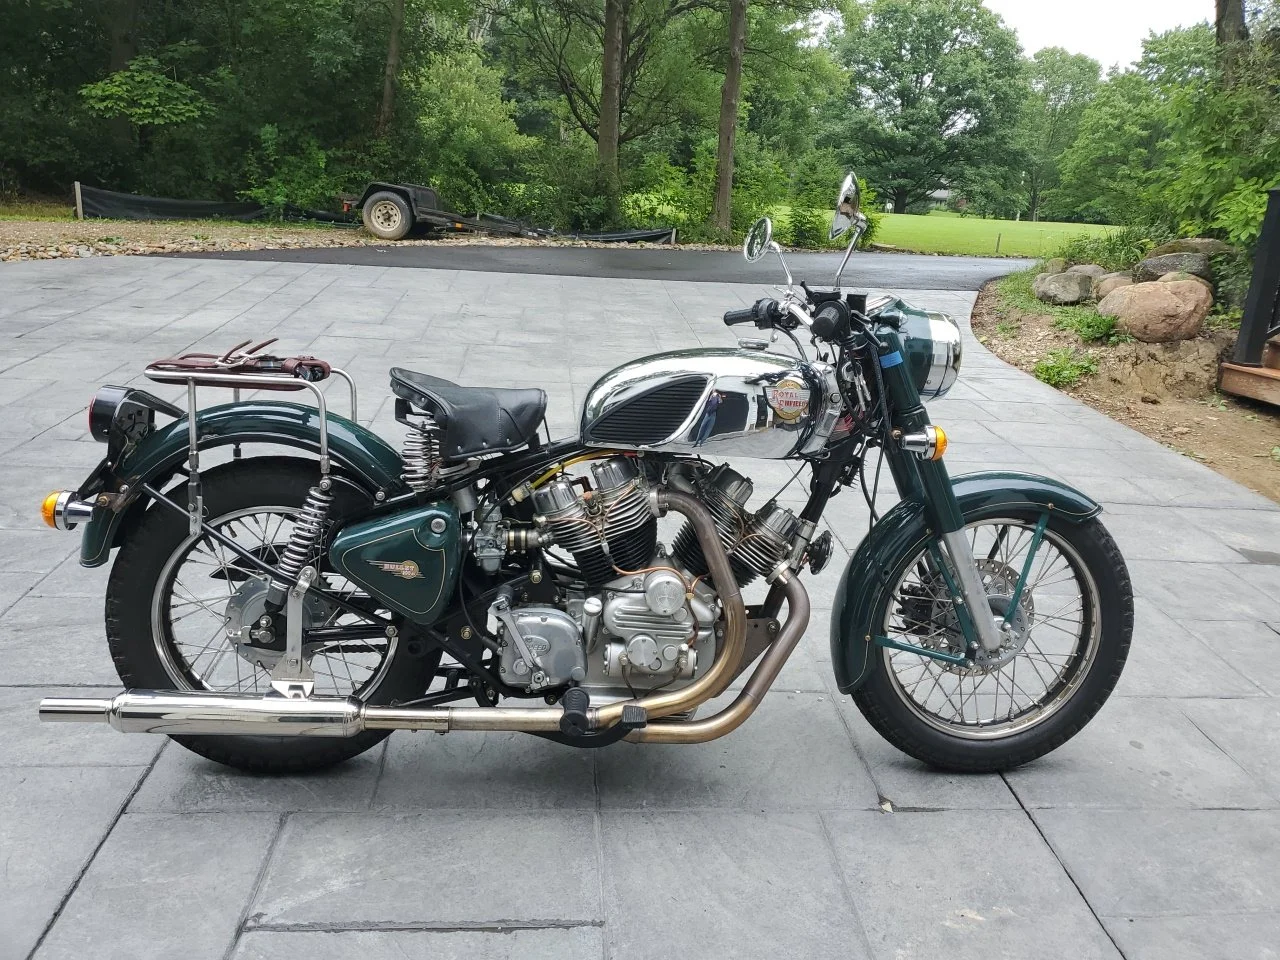
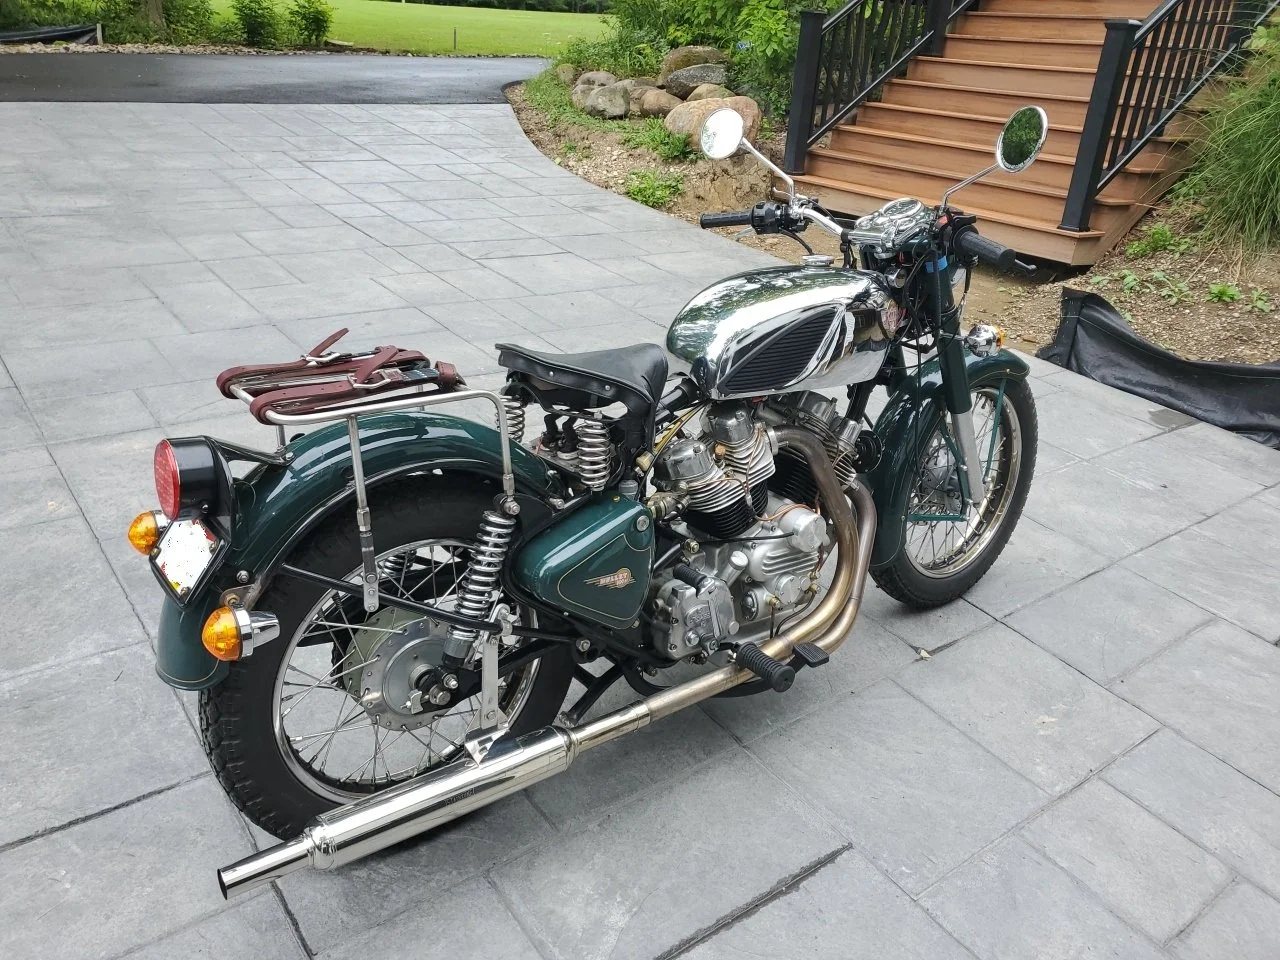
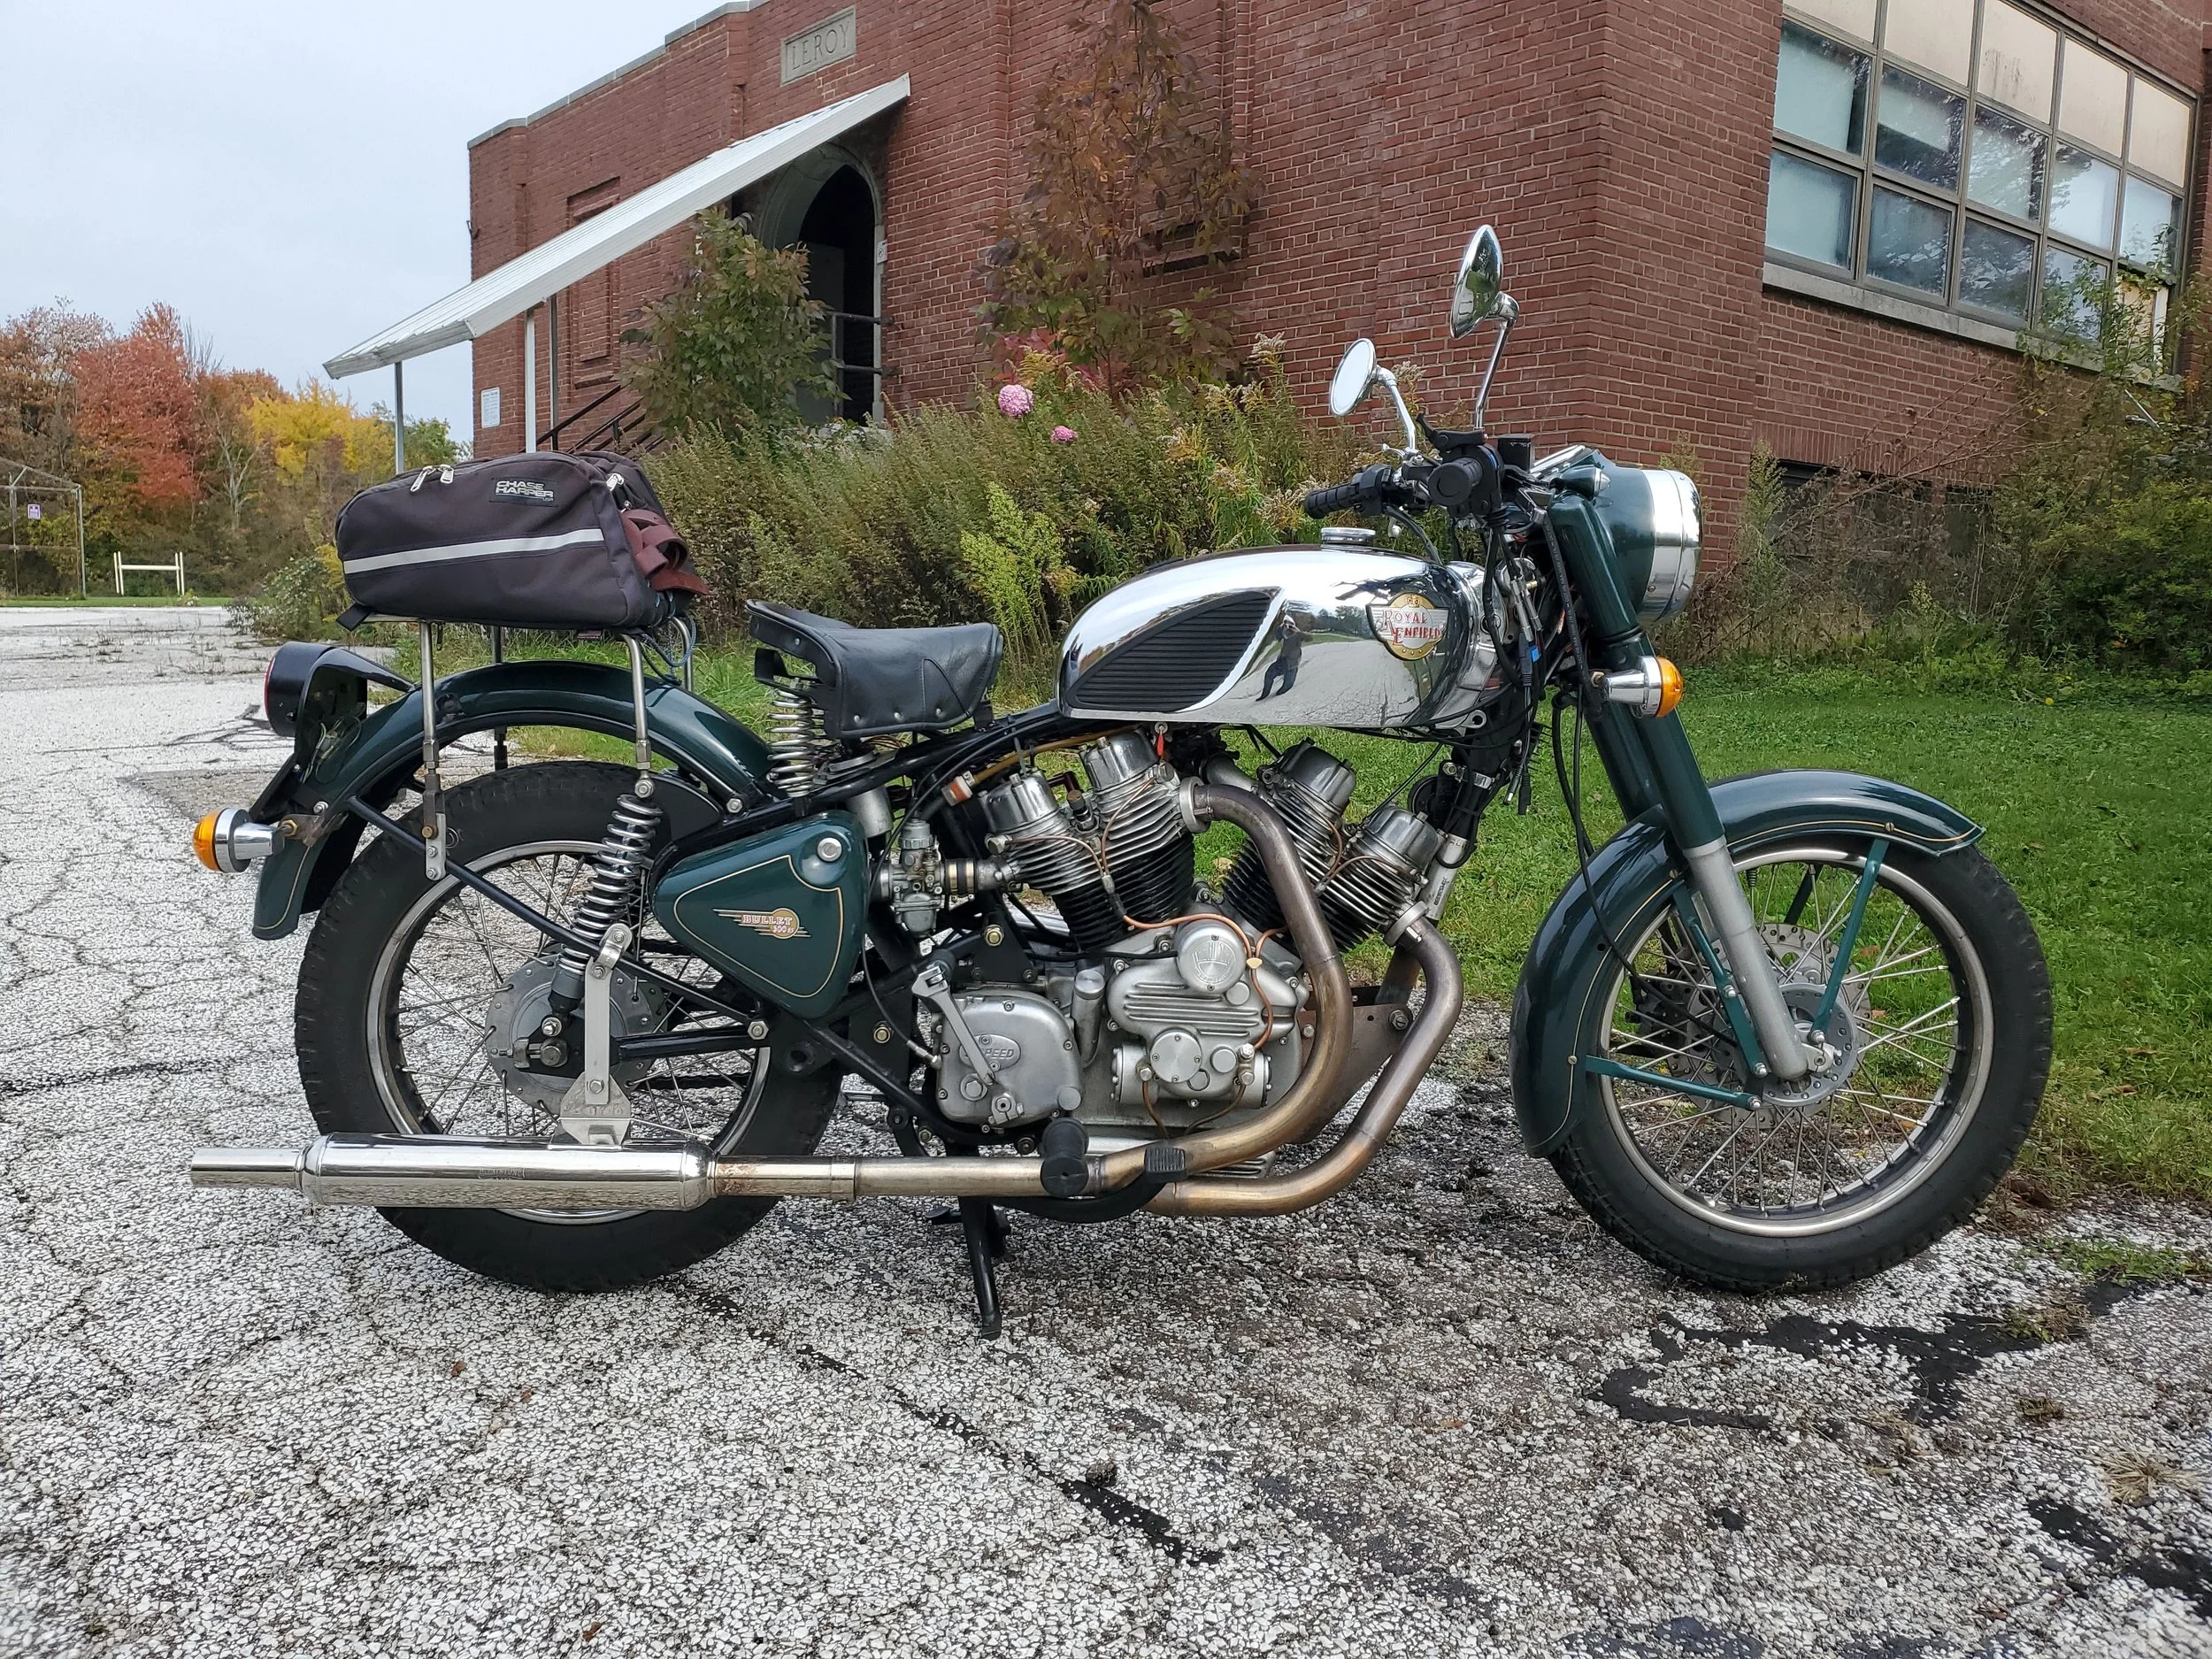
Aniket had taken a 350cc single cylinder Royal Enfield Bullet engine, removed all the components that sit above the crankcase (connecting rod, piston, cylinder, and cylinder head with its valve train), bought a second set of those components, and built an entire crankcase to accept these two sets of parts to form his own 700cc V-twin engine. He then modified and customized the Royal Enfield’s rolling chassis to accept this beautiful engine. He continued to make these motorcycles, some with two 500cc top ends giving 1,000cc of displacement. He gave his creations the name “Musket.” What an extraordinary achievement.
I like to make things and Aniket agreed to sell me just the engine and I would build the motorcycle around it.
So I started with a running 2008 iron barrel 500cc Bullet which gave me the frame and running gear. I extended the frame to receive the new longer engine. I fabricated exhaust header pipes and purchased an Australian “Staintune” stainless steel baloney shaped muffler (nothing makes a better sound than a Staintune muffler) and made a custom straight link pipe. A used chrome Royal Enfield Constellation gas tank was fitted and behind it a single Lycett style seat was mounted on exposed springs Stainless steel wheel rims were added with stainless steel spokes. A 1 inch wide black stripe was painted down the middle of the wheel rims with a 1/8 inch gold stripe on each side of the black stripe. Up front the drum brake was replaced with a disk brake and a more retro looking front fender. Royal Enfields have a beautiful aluminum “casquette” (also known as a “nacelle”) that served as the upper front fork triple clamp as well as the headlight, and instrument mounts. I had to keep it because of its distinctive look but some reconfiguring was done including adding a speedometer like the old English type that read upside down to today’s units (the needle at 0 mph is in the 2:00 position and then rotates clockwise) and a tachometer. At the rear I bent and welded some ½ inch OD stainless steel tubing to make a luggage rack. The tail light is my usual 4 inch trailer LED tail light (with 24 LED lights) put in a 4 inch ID PVC drain pipe cap.
In the electrical department a high output alternator was added with classic Lucas style turn signals installed in all 4 corners. In the left side tool box a fuse panel and additional relays were tucked away. Many changes were made to the stock wiring so I first digitally scanned the original 8 ½ x 11 black and white wiring diagram, colored each and every wire using MS Paint and saved that as the original wiring. Then I revised it to memorialize all my wiring changes to it and saved it to a different file name. This now allows me to print a large color 24” x 36” diagram.
This 1,000 cc machine is a kick start only and you are kicking a 500cc cylinder but it is relatively low compression so it kicks over easily.
When I sold this motorcycle I had ridden it 5,633 miles.